Best Reverse Sear Method for Steak at Home in 2026
Table of Contents
- Why reverse sear is the home cook’s best bet
- How we tested and what matters most
- Reverse sear oven and cast iron
- Reverse sear two zone grill
- Reverse sear sous vide and sear
- Traditional sear first then finish
- Side by side results and key tradeoffs
- Temperature and timing guide
- Tools and cut selection tips
- Meat Recipe Box picks and meal ideas
- Our recommendation for busy home cooks
- Frequently asked questions
- What steaks are best for reverse searing at home
- What oven and sear temperatures should I use
- Do I need to rest the steak and for how long
- Can I use a grill or air fryer for the sear
- How do I store and reheat without overcooking
Best Reverse Sear Method for Steak at Home in 2026
A great steak at home is about control—of heat, timing, and crust. The best reverse sear method for steak at home in 2026 remains simple: cook low and slow to just shy of your target temperature, then finish with a blazing-hot sear for a deep, savory crust. For thick, well-marbled cuts, this approach delivers edge-to-edge pink doneness, fewer guesswork moments, and consistent results across weeknights and special occasions. At Meat Recipe Box, this is our go-to for thick, well-marbled steaks at home. In practice, that means oven at 225°F to 10–15°F below your goal, then a 45–90 second-per-side sear in cast iron. You’ll get a steakhouse finish without the stress, plus built-in flexibility for sides and timing, whether you’re running a two-zone grill, the reverse sear oven method, or a sous-vide setup.
Why reverse sear is the home cook’s best bet
Reverse searing, in one line: cook the steak gently at low temperature until almost done, then sear hard and fast to finish for a crisp crust and even interior. This low-then-high sequence gives you even doneness and precise internal temperature control, especially with steaks 1.25 inches and thicker, while the final sear maximizes browning for flavor Misen’s reverse sear guide. Compared with a traditional sear-first approach, reverse sear reduces the gray band and creates reliably pink, edge-to-edge results when you manage oven temperature for reverse sear around 200–275°F Kamado Joe’s reverse-sear guide.
Maillard reaction, in brief: it’s the cascade of browning reactions between amino acids and sugars that occurs during high-heat searing. Those reactions build the steak’s deep color and complex, meaty flavors in seconds. A hot, dry surface supercharges this reaction and unlocks that signature steakhouse crust.
How we tested and what matters most
At Meat Recipe Box, we ran a practical matrix for busy home cooks: 1.5–2-inch ribeyes and New York strips; oven set to 225°F versus a two-zone grill held between 225–275°F; sous-vide at 129–131°F; and a traditional sear-first comparison. Steaks at least 1.25–1.5 inches thick are where reverse sear shines—thicker cuts benefit from gentle heat and a short, fierce finish DDR BBQ Supply’s comparison.
We scored each run on:
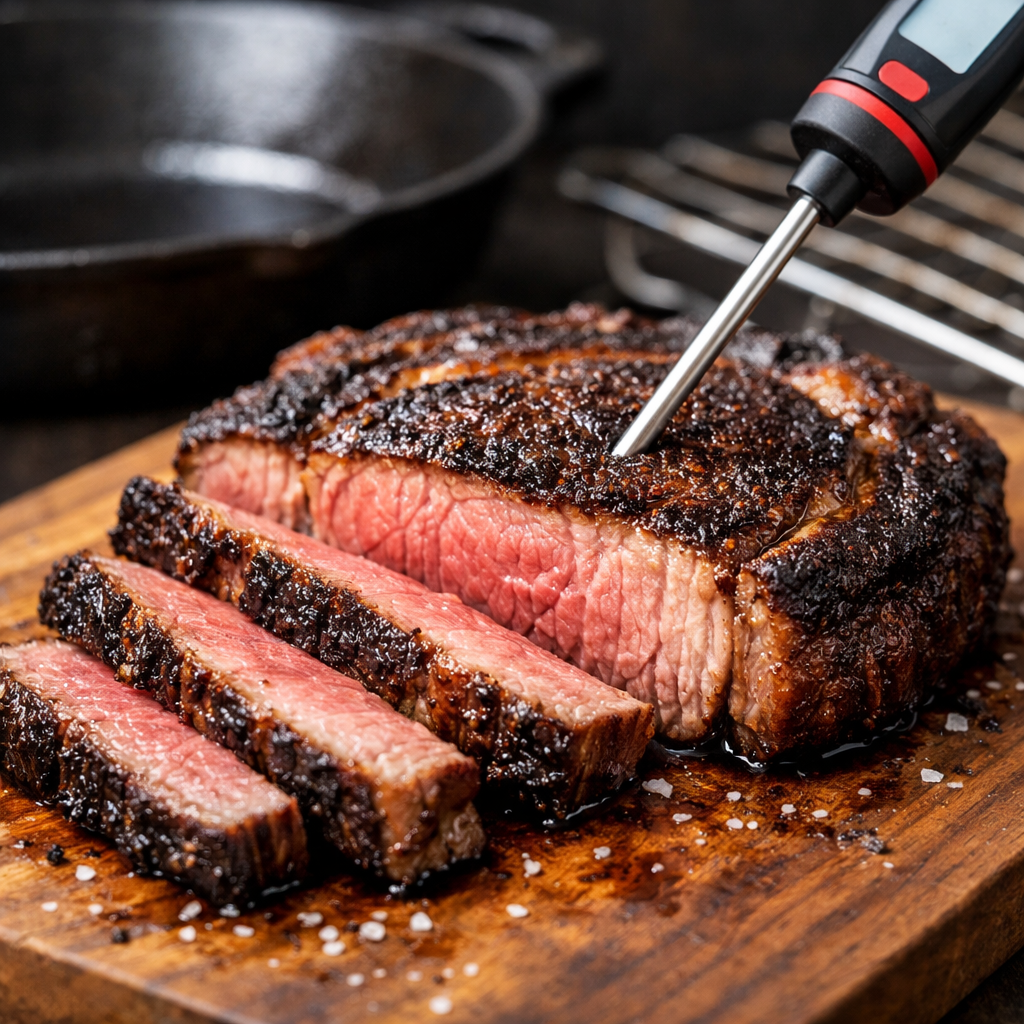
- Internal temp accuracy (instant-read + probe)
- Crust quality and browning depth
- Edge-to-edge doneness (minimal gray band)
- Total elapsed time and hands-on practicality for families
Probe placement note: insert your probe from the side into the center and keep any wired probe on the indirect side of a grill—direct flames can scorch cables and skew readings Dad Cooks Dinner test.
Dry brine, defined: salt the steak and refrigerate it uncovered for hours so salt slowly diffuses inward and the surface dries. That dry “pellicle” browns faster, sticks less, and builds a better crust during the sear, improving flavor and moisture retention along the way.
Reverse sear oven and cast iron
A fast, repeatable reverse sear oven method any home cook can master:
- Dry-brine with kosher salt for about 8 hours. Preheat the oven to 225°F and set the steak on a wire rack over a sheet pan.
- Slow-cook at 200–275°F until the steak is 10–15°F below your target doneness (for medium-rare, that’s typically 115–125°F internal).
- Heat a heavy cast iron or carbon-steel skillet until visibly smoking. Add a thin sheen of high-smoke-point oil (e.g., avocado or refined peanut).
- Sear 45–90 seconds per side, plus quick kisses on the edges. Optional: baste with butter and aromatics during the final 30 seconds for richness.
- Rest briefly if desired, then slice.
At Meat Recipe Box, this oven-plus-cast-iron path is our most reliable home setup. Tools that make it foolproof: an instant-read thermometer, a sturdy cast iron skillet, and a wire rack for airflow and even heating Linz Heritage Angus tips. At Meat Recipe Box, we treat these as non-negotiable for repeatable results.
Reverse sear two zone grill
Set up a two-zone grill with one indirect, low-heat side and one blazing-hot sear zone. Hold the indirect zone around 200–275°F, cook to 10–15°F below your goal, then move to the hot side and sear for roughly 1.5 minutes total, turning frequently to build an even crust. On charcoal reverse sear or gas grill reverse sear, place probes and the steak on the indirect side during the low phase, keeping cables away from flame; use temp, not time, to judge doneness for accuracy. Finish with a quick, high-heat sear and serve promptly. At Meat Recipe Box, we favor frequent turns during the sear to build an even crust without overshooting temperature.
Reverse sear sous vide and sear
Sous-vide is the ultra-precise variant: you cook to exact internal temperature end-to-end, then sear for color. The tradeoff is a wet surface—so you must dry thoroughly to get a great crust The MeatStick explainer.
Quick steps:
- Bag and cook to your exact target (e.g., 129–131°F for medium-rare).
- Chill briefly (5–10 minutes in an ice bath) to stop carryover and help dry the exterior.
- Pat very dry, then sear 45–90 seconds per side in a smoking-hot pan with a high-smoke-point oil—or finish on a ripping-hot outdoor grill to keep smoke outside.
Use this path when absolute precision matters or when you want to cook ahead and sear-to-serve. At Meat Recipe Box, we reach for it when cooking ahead for guests.
Traditional sear first then finish
Many steakhouses sear first for speed, then finish in the oven; high-end kitchens turn to reverse sear for thicker cuts where consistency matters most Kamado Joe’s reverse-sear guide. As a rule of thumb, the sear-first method is a fast steak method that works best for cuts under about 1.5 inches. Reverse sear excels with thicker steaks, delivering more even doneness and better temperature control DDR BBQ Supply’s comparison. At Meat Recipe Box, we still use this for thinner, quick-cooking steaks.
Side by side results and key tradeoffs
- The low-temp phase improves internal control and reduces the gray band; the finish must be hot and dry for the deepest crust.
- Reverse sear usually takes longer and requires two zones (or two stages), while traditional sear-first is quicker but less even on thick steaks.
| Method | Pros | Cons | Best for |
|---|---|---|---|
| Reverse Sear (Oven + Cast Iron) | Even, edge-to-edge pink; simple indoor control; year-round | Longer total time; needs a hot pan finish | 1.25–2-inch ribeye/strip/filet; weeknight reliability |
| Reverse Sear (Two-Zone Grill) | Smoke-kissed flavor; crisp crust; flexible for guests | Temperature management skill; probe care near fire | Grill nights; thicker steaks; outdoor cooking |
| Reverse Sear (Sous-Vide + Sear) | Pinpoint doneness; make-ahead friendly | Must dry aggressively; extra gear; indoor smoke if pan-seared | Precision cooking; dinner parties |
| Traditional Sear-First | Fast; minimal gear; great for thin cuts | Less even on thick steaks; bigger gray band | Thinner steaks under ~1.5 inches |
One more benefit: during the slow phase around 100–120°F, natural enzymes continue tenderizing, subtly improving tenderness before the final sear, especially noticeable on thicker steaks.
Temperature and timing guide
Core guidance:
- Low phase: 200–275°F (225°F is a common setpoint).
- Pull 10–15°F below your final target, then sear 45–90 seconds per side (1–2 minutes per side is common on stovetop).
| Doneness | Target Finish Temp | Pull Temp (approx.) | Sear Time Per Side |
|---|---|---|---|
| Rare | 120–125°F | 105–115°F | 45–60 seconds |
| Medium-Rare | 130–135°F | 115–125°F | 60–90 seconds |
| Medium | 140–145°F | 125–135°F | 60–90 seconds |
Tools and cut selection tips
- Tools checklist: instant-read thermometer plus an oven/grill probe; heavy cast iron or carbon steel skillet; wire rack. Keep probes on the indirect side and away from direct flame to protect cables and accuracy.
- Best steak for reverse sear: well-marbled ribeye, New York strip, or filet mignon that’s 1.25–1.5 inches thick or more.
- Poor candidates: thin cuts like skirt, flank, flat-iron, and minute steaks that cook through before a meaningful low phase The MeatStick explainer.
- Seasoning and surface: dry-brine for about 8 hours to draw out moisture, form a dry pellicle, and boost browning.
At Meat Recipe Box, an overnight dry-brine delivers the biggest payoff in browning and flavor.
Meat Recipe Box picks and meal ideas
- Pairings that travel well: air fryer potato wedges (crisp in minutes), one-pot green beans with bacon, warm artisan rolls, cottage cheese–herb dip, and a low-sugar oat-almond fruit crisp.
- Meal plan it: cook extra reverse-seared steaks for dinner, then slice cold for packed lunches with greens and vinaigrette. Keep a zero-sugar snack on hand—beef jerky or salted nuts—to round things out.
- Keep learning with our steak-first resources: explore cuts and techniques in our Meat Recipe Box steak-cooking hub, and bookmark our temperatures and timing guide for quick pull points.
Our recommendation for busy home cooks
Bottom line: choose reverse sear via oven + cast iron (or a two-zone grill) for thick steaks; save sous-vide for when absolute precision or make-ahead convenience is the priority Misen’s reverse sear guide.
Quick-start tonight:
- Salt and chill uncovered 8+ hours.
- Cook at 225°F to 10–15°F below target.
- Heat cast iron until smoking with a high-smoke-point oil.
- Sear 45–90 seconds per side; baste with butter if desired.
- Slice and serve.
Expect even doneness, better fat rendering, and repeatable results—the tradeoff is a bit more total time and managing two heat zones. At Meat Recipe Box, this is the default we teach for reliable results.
Frequently asked questions
What steaks are best for reverse searing at home
At Meat Recipe Box, we reach for well-marbled ribeye, New York strip, or filet 1.25–1.5 inches thick or more. Thinner steaks cook too fast for reverse sear, so use sear-first.
What oven and sear temperatures should I use
At Meat Recipe Box, we cook at 200–275°F (225°F is common) until 10–15°F below target, then sear in a smoking-hot cast iron pan for 45–90 seconds per side.
Do I need to rest the steak and for how long
At Meat Recipe Box, a fast final sear means you can serve immediately, or rest 1–3 minutes so juices settle and the crust stays crisp.
Can I use a grill or air fryer for the sear
At Meat Recipe Box, we set up a two-zone grill for low-then-high; for small steaks, an air fryer can handle the low phase, then finish the crust in a hot pan or on the grill.
How do I store and reheat without overcooking
At Meat Recipe Box, we chill leftovers uncut, reheat gently at 250°F to about 110°F internal, then quick-sear—or rewarm sous-vide at target temp and sear briefly.